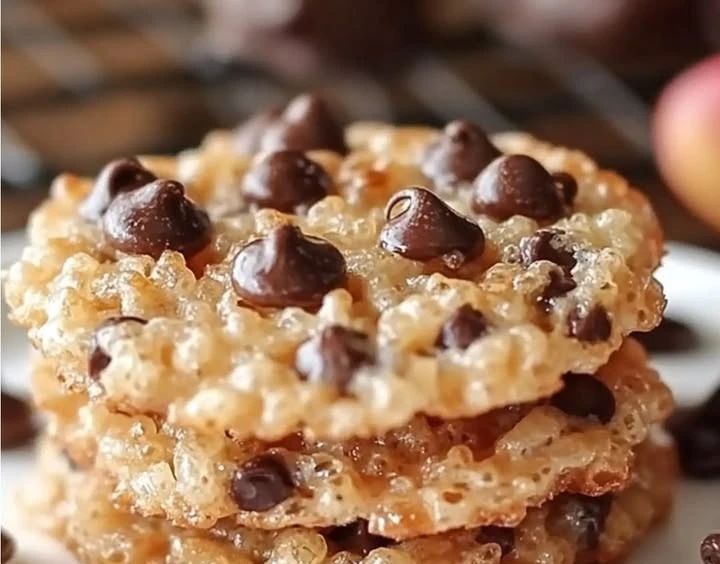
These gooey, chocolatey Carmelitas bars remind me of sneaking bites of cookie dough as a kid
Carmelitas are a wonderful treat that combines the rich, gooey goodness of caramel with the deliciousness of chocolate and oats. Each bite is like a little piece of heaven that takes you back to your childhood – sneaking bites of cookie dough when no one was looking. Whether you are making them for a family gathering, a potluck, or simply for yourself, these caramel bars are sure to be a hit. They are easy to make and packed with flavors that everyone loves. In this article, we will dive into why you will love this recipe, how to prepare it, and all the details you need to make the perfect casrocarmelitas.

Why You Will Love This Recipe
There are many reasons to fall in love with these Carmelitas. First, they are incredibly easy to prepare. Even if you are not an experienced baker, you can whip these up in no time. The ingredients are simple and straightforward, making it easy for anyone to follow the recipe.
Second, the combination of flavors is out of this world. The buttery, crumbly oat crust pairs beautifully with the gooey caramel and chocolate layers. Each bite offers a delightful balance of textures – soft, chewy, and crunchy.
Finally, these bars are versatile. You can enjoy them as a dessert, a snack, or even a delicious treat to share with friends and family. They are a great choice for any occasion, and their delightful taste will have people coming back for more.
How to Prepare The Best Easy Carmelitas
Creating delicious Carmelitas at home is easier than you might think. Just follow these simple steps, and you’ll have a batch of warm, gooey bars ready to enjoy.
Ingredients:
- 8 oz caramel squares
- 5 tbsp half and half
- 1 cup all-purpose flour
- 1 cup oats (old-fashioned or quick)
- 1 cup brown sugar, packed
- 1/2 cup unsalted butter, melted
- 1/2 tsp baking soda
- 1/4 tsp salt
- 1 cup chocolate chips (semi-sweet or milk chocolate)
Instructions:
-
Preheat the Oven: Start by preheating your oven to 350°F (175°C). This ensures that your Carmelitas will bake evenly.
-
Make the Crust: In a mixing bowl, combine the melted butter, brown sugar, oats, flour, baking soda, and salt. Mix until the ingredients form a crumbly mixture.
-
Press into the Pan: Line an 8×8-inch baking dish with parchment paper for easy removal. Take about two-thirds of the oat mixture and press it firmly into the bottom of the prepared baking dish. This will be your crust.
-
Prepare the Caramel: In a small saucepan, combine the caramel squares and half and half. Heat over low heat, stirring constantly until the caramel is melted and smooth. Be careful not to burn it.
-
Spread the Caramel: Once the caramel is ready, pour it over the crust in the baking dish. Use a spatula to spread it evenly.
-
Add the Chocolate Chips: Sprinkle the chocolate chips evenly over the melted caramel layer.
-
Top with Remaining Oat Mixture: Crumble the remaining oat mixture over the chocolate chips. This will create a delicious topping for your bars.
-
Bake: Place the baking dish in the preheated oven and bake for 25-30 minutes or until the edges are golden brown and the top is set.
-
Cool and Cut: Allow the Carmelitas to cool completely in the pan on a wire rack before cutting them into squares. This helps them set up nicely.
-
Enjoy: Once cooled, enjoy your delicious Carmelitas!
How to Serve The Best Easy Carmelitas
Serving Carmelitas is a delightful experience. They can be served in many ways, depending on the occasion:
-
As a Dessert: Serve them warm with a scoop of vanilla ice cream on the side. The combination of warm bars and cold ice cream is simply divine.
-
As a Snack: Cut them into smaller squares to create bite-sized treats for snacking. They also make a great addition to a dessert platter at parties.
-
With Coffee or Tea: Pair your Carmelitas with a cup of coffee or tea for a delicious afternoon treat. The sweetness of the bars pairs beautifully with the warm flavors of your drink.
How to Store The Best Easy Carmelitas
Storing Carmelitas is easy! Here are some tips:
-
At Room Temperature: If you plan to eat them within a few days, store your Carmelitas at room temperature in an airtight container. They will remain delicious for about 4-5 days.
-
In the Refrigerator: For longer storage, you can keep them in the refrigerator. Just make sure to place them in an airtight container. When properly stored, they can last up to 1-2 weeks in the fridge.
-
In the Freezer: If you want to save them for later, Carmelitas freeze well. Wrap them tightly in plastic wrap or aluminum foil and place them in a freezer-safe container. They can be frozen for up to 3 months. When you are ready to enjoy them, simply thaw them at room temperature.
Tips for Preparing The Best Easy Carmelitas
-
Use Good Quality Ingredients: For the best flavor, use high-quality chocolate chips and caramel squares. It can make a big difference in the final taste.
-
Don’t Overmix: When making the crust, mix just until combined. Overmixing can lead to tougher bars instead of the desired chewy texture.
-
Cool Completely: Allow the bars to cool completely before cutting them. This helps them set properly and makes them easier to cut into clean squares.
-
Adjust Sweetness: If you prefer a less sweet bar, you can reduce the amount of brown sugar or chocolate chips slightly.
Variation
While the original recipe is fantastic on its own, you can easily customize your Carmelitas:
-
Add Nuts: For an extra crunch, consider adding chopped nuts such as pecans or walnuts to the chocolate layer.
-
Use Different Chocolates: Feel free to mix things up by using dark chocolate or white chocolate chips instead of semi-sweet or milk chocolate.
-
Add a Pinch of Sea Salt: Sprinkling a little flaky sea salt on top of the warm bars right after they come out of the oven adds a delicious salty contrast to the sweetness.
Frequently Asked Questions
1. Can I use homemade caramel instead of store-bought?
Yes! If you prefer, you can make your own caramel sauce at home. Just make sure it’s thick enough to hold its shape when poured over the crust.
2. Can I use gluten-free flour in this recipe?
Absolutely! If you need a gluten-free option, you can substitute all-purpose flour with a gluten-free flour blend.
3. How do I know when the Carmelitas are done baking?
Carmelitas are done baking when the edges are golden brown, and the top appears set. A slight jiggle in the center is okay, as they will firm up as they cool.
Conclusion
The Best Easy Carmelitas are the perfect treat for any occasion. With their gooey caramel, rich chocolate, and buttery oat crust, they are sure to please. This simple recipe allows you to create these delightful bars in your own kitchen with ease. Take a trip down memory lane with every bite, and enjoy sharing these sweet treats with family and friends. Happy baking!
