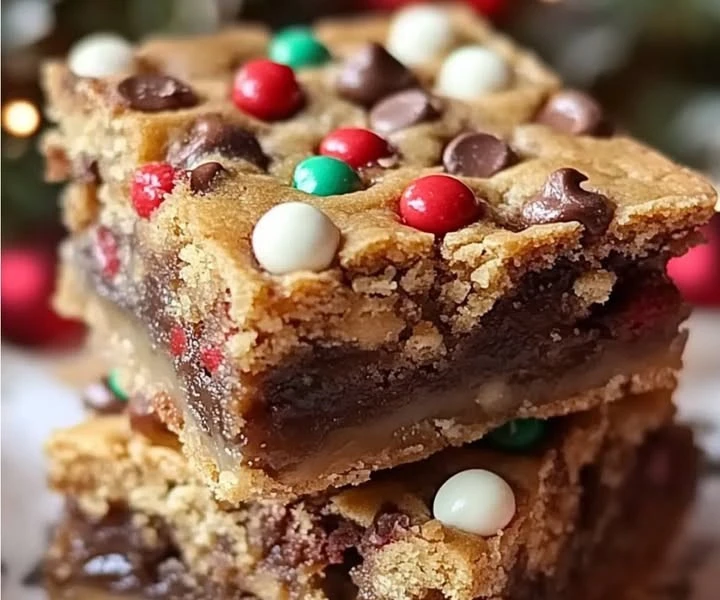
Christmas Cookie Bars
Christmas Cookie Bars : the holiday season is a time filled with joy, family gatherings, and delicious treats. One of the most delightful recipes to embrace this festive spirit is Christmas Cookie Bars. These bars are not just ordinary cookies; they are a blend of sweetness, chewiness, and holiday cheer. Whether it’s for a cookie exchange, a holiday party, or a cozy night in, these Christmas Cookie Bars are sure to brighten your celebrations.
Making Christmas Cookie Bars is not only easy but also a fun activity to do with family and friends. You can decorate them with colorful sprinkles, chocolate chips, or even festive icing. Let’s dive into why you will love this recipe and how to prepare it!
Why You Will Love This Recipe
Christmas Cookie Bars are loved by many, and here are some reasons why:
- Easy to Make: Unlike traditional cookies that require balling up dough and spacing them on a baking sheet, cookie bars are simply placed in a pan and baked as one giant dessert. This saves time and effort.
- Delicious Flavor: The combination of butter, sugar, and festive spices creates a delightful taste that captures the essence of the holiday season.
- Customizable: You can add your favorite ingredients or toppings, such as nuts, dried fruits, or different types of chocolate, to make them your own.
- Perfect for Sharing: These bars cut easily into squares, making them perfect for sharing at parties, gifting, or bringing to holiday gatherings.
- Memorable Experience: Baking these bars can become a cherished family tradition, bringing everyone together in the kitchen to create something delicious.
Now that you are excited about the possibilities, let’s take a look at how to prepare these delightful Christmas Cookie Bars!
How to Prepare Christmas Cookie Bars
To make Christmas Cookie Bars, you will need some simple ingredients and follow a few easy steps. Here is a list of the ingredients you will need and the instructions to guide you through the process.
Ingredients
- 2 ½ cups all-purpose flour
- 1 teaspoon baking soda
- ½ teaspoon salt
- 1 cup unsalted butter, softened
- 1 cup granulated sugar
- 1 cup packed brown sugar
- 2 large eggs
- 2 teaspoons vanilla extract
- 2 cups holiday sprinkles (plus extra for topping)
- 1 cup chocolate chips (optional)
Instructions
- Preheat the Oven: Start by preheating your oven to 350°F (175°C). This ensures that the cookie bars will bake evenly.
- Prepare the Baking Dish: Grease a 9×13 inch baking dish with butter or line it with parchment paper. This will help the bars come out easily after baking.
- Mix Dry Ingredients: In a medium bowl, whisk together the flour, baking soda, and salt. Set aside.
- Cream the Butter and Sugars: In a large bowl, use an electric mixer to beat together the softened butter, granulated sugar, and brown sugar until the mixture is light and fluffy. This usually takes about 2-3 minutes.
- Add Eggs and Vanilla: Crack in the eggs, one at a time, mixing well after each addition. Then add the vanilla extract and blend until combined.
- Combine Wet and Dry Ingredients: Gradually add the dry mixture to the wet mixture. Stir until just combined. Be careful not to overmix, as this can make the bars tough.
- Fold in the Mix-Ins: Gently fold in the holiday sprinkles and chocolate chips if you are using them. These add that festive touch and delicious taste!
- Spread in the Dish: Pour the batter into the prepared baking dish and spread it evenly with a spatula. Sprinkle some extra holiday sprinkles on top for decoration.
- Bake: Place the baking dish in the oven and bake for about 25-30 minutes. The bars are done when the edges are golden brown, and a toothpick inserted in the center comes out clean.
- Cool and Cut: Allow the bars to cool in the baking dish for about 10 minutes. Then transfer them to a wire rack to cool completely. Once cool, cut into squares and enjoy!
How to Serve Christmas Cookie Bars
Christmas Cookie Bars can be served in various ways, making them versatile for any occasion. Here are some suggestions on how to serve them:
- At Parties: Cut the bars into small squares and place them on a decorative platter. Add a few festive decorations like mini Christmas trees or holiday-themed napkins to create a cheerful display.
- As Gifts: Package some cookie bars in a clear bag tied with a ribbon. This makes for a delicious homemade gift to give to friends, neighbors, or coworkers.
- With Hot Drinks: Serve these bars alongside hot chocolate, coffee, or tea. The combination of warm drinks and sweet treats is perfect for holiday gatherings.
- With Ice Cream: For a dessert twist, serve the cookie bars warm with a scoop of vanilla ice cream on top. Drizzle with chocolate sauce for extra indulgence.
How to Store Christmas Cookie Bars
Proper storage will keep your Christmas Cookie Bars fresh and delicious. Here are some tips on how to store them:
- Room Temperature: If you plan to eat the bars within a few days, store them in an airtight container at room temperature. They will stay soft and chewy for about 3-5 days.
- Refrigeration: For longer storage, place the cookie bars in the refrigerator. They can last up to a week. Just be sure to keep them in an airtight container to prevent them from drying out.
- Freezing: If you want to save some for later, you can freeze the bars. Wrap individual squares in plastic wrap and place them in a freezer-safe bag. They will keep well in the freezer for up to 3 months. When you’re ready to enjoy them, let them thaw at room temperature or reheat in the oven for a few minutes.
Tips for Preparing Christmas Cookie Bars
To ensure that your Christmas Cookie Bars turn out perfect every time, here are some helpful tips:
- Use Room Temperature Ingredients: Make sure your butter and eggs are at room temperature before starting. This helps them mix better, resulting in a smoother batter.
- Don’t Overmix: When combining the wet and dry ingredients, mix until just incorporated. Overmixing can lead to tough, dry cookie bars.
- Customize the Toppings: Feel free to experiment with the mix-ins. You can add nuts, crushed candy canes, or even dried fruits to give the bars your own twist.
- Check for Doneness: Ovens vary, so start checking your bars a few minutes before the minimum baking time. If the edges are lightly golden and a toothpick comes out clean, they are ready.
- Let Them Cool: Be patient and let the bars cool before cutting. This helps them hold their shape and makes for cleaner cuts.
Variation
While the classic recipe is delightful on its own, here are a couple of variations to try:
- Chocolate Christmas Cookie Bars: Add 1 cup of cocoa powder to the dry ingredients to create a rich chocolate version. You can also add festive white chocolate chips for contrast.
- Nutty Cookie Bars: Incorporate 1 cup of chopped nuts such as walnuts or pecans for added crunch and flavor. This gives the bars a nice texture and makes them more unique.
Frequently Asked Questions
1. Can I use margarine instead of butter?
Yes, you can substitute margarine for butter. However, using unsalted butter is preferred for flavor. Keep in mind that the texture might vary slightly.
2. Can I make these bars gluten-free?
Absolutely! You can use a gluten-free all-purpose flour blend to make these bars gluten-free. Just ensure that all other ingredients are gluten-free.
3. How can I make the bars more festive?
To make your Christmas Cookie Bars more festive, you can add edible glitter, themed sprinkles, or even a light drizzle of icing on top.
4. What should I do if my bars are too crumbly?
If your cookie bars turn out crumbly, it could be due to overbaking or not enough moisture in the dough. Try reducing the baking time or adding a bit more butter next time.
5. Can I use different types of sugar?
You can experiment with different types of sugar, like coconut sugar or honey, but keep in mind that they may alter the texture and flavor of the cookies.
By making these Christmas Cookie Bars, you’re not just baking; you’re creating lasting memories with family and friends. Enjoy the laughter, love, and holiday spirit that fills your kitchen while preparing this festive treat. Happy baking!